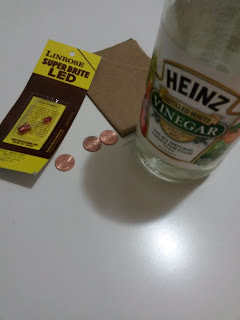
Materials you'll need:
1. Pennies dating after 1982
2. Sandpaper (I used a 60-grit)
3. A bowl
4. Vinegar
5. Cardboard
6. Scissors
7. Item you wish to power
How to Do it!
Step 1: Gather your materials!
Step 2: Put the bowl, vinegar, cardboard, and scissors to the side for now.
Step 3: Use the sandpaper on the "tails" side of the coin, I found this to be the quickest side to sand down. Sand only one side of the penny until it completely exposes the zinc.
Step 4: Repeat step three to as many pennies as you would like. I sanded only three pennies for this project and still got great results.
Step 5: Now put the pennies to the side and bring out the items from step two.
Step 6: Cut out circles that are slightly larger than your pennies. The number of pennies you are using is one more than the amount of cardboard pieces you need. So if I have 3 pennies, I need 2 cardboard pieces.
Step 7: Put the cardboard circles into the bowl and pour enough vinegar onto it so it's covered.
Step 8: After 5 minutes the cardboard should have soaked up a good amount of vinegar. Take the pieces out ans tap dry them.
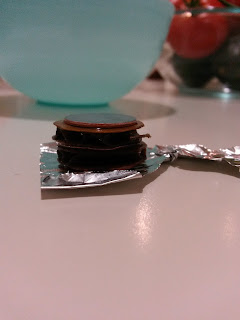
Step 9: Finally it is time for stacking the pennies. On the bottom is a penny with the zinc side facing up, next is a piece of vinegar cardboard, then a penny zinc face up. Continue this pattern until you have no more pennies and there is a coin at the top.
Step 10: Test your battery. You can do all sorts of things! To make sure the energy flows correctly a simple led light can be used. This gives you a visual understanding of the power in pennies. When using wires, put tin foil at the very bottom of the stack so it can flow into the wire easily instead of you holding them together for a while.


Wow! This is so cool! Why was the zinc in pennies changed after 1982?
ReplyDeletePennies used to be pure copper before, but because of the rising demand for copper the penny became worth more than 1 cent. Because of that the money people had to change the material it was made out of; they chose zinc. For the battery we need zinc, and why would you go out and buy some? Although pennies still are copper plated today. :)
DeleteWow, this is very interesting.
ReplyDelete